Okay, I’m terrible at naming my looks, but here’s a breakdown of a look I did for a TV commercial I finished last month. I was wanting to give the footage the feel of intelligence, subtlety, and class, so I went with earth tones and a lower saturation.
[box type=”info”]One note – I switched at the first of this year from Apple Color to DaVinci Resolve. It’s a great system and I haven’t looked back. I have a few older looks I’ll be posting sometime soon that have Apple Color presets with them, but my more recent projects (as well as all future projects) will be on Resolve and will have PowerGrades available for download. [/box]
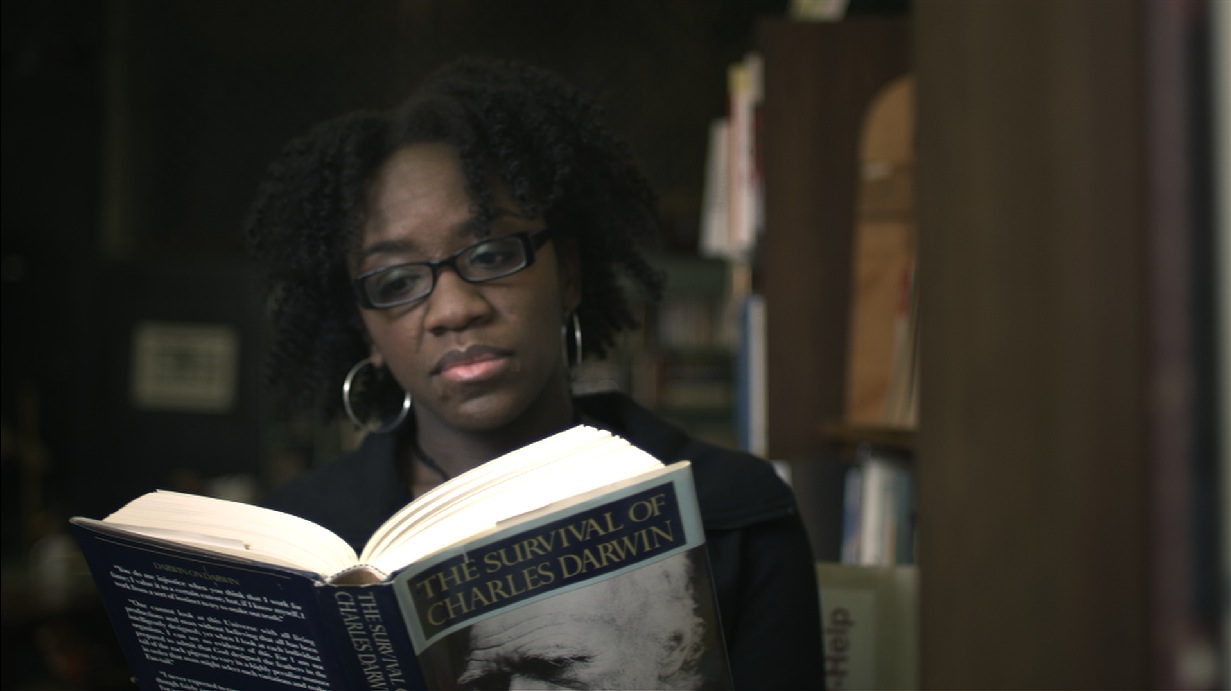
Here’s what the end result will be:

The Final Look
I started with the unbalanced shot (by the way, the footage was shot on a Red Epic and graded natively in Resolve):

The raw image.
The first step is to balance the image. The raw is a little on the brown side and low contrast:

The balanced image.

A little blue in the miss and highlights to get rid of that brownish tint, and also stretching the contrast a bit by raising the highlights and miss and lowering the blacks.
Now I want to bring focus to the actress a bit with an edge vignette, so I’ll make a new node with a circular power window set to outside the mask:

Center the vignette on the subject to draw attention to her.

Window settings

Lower all three tonal areas by about the same small amount to make a nice darkness vignette

Vignette with the window outline off.
I want to bring a little more attention to her face, and also bring her skin tones just a little bit cooler (to compensate for what I know my final look will do), so I’ll make a new outside node:

Inside vignette part 1.

Lift the highlights a good bit and push them towards blue.

Inside vignette part 2.

Darken the mids to increase contrast on her face and push the miss a little towards an indigo.
Now to create the look itself. I want a lower contrast, darker look with mix of greenish shadows and warmer highlights to work with my location and give that air of class. By the way, this color combination is inspired by a classic 30’s and 40’s office. Think of the hazy private detective’s office with the rich wood furniture and green lamp, chair, etc.

Step 1 – make it dark.

Lower the highlights a little and the mids a good bit. Don’t worry, we’ll get our shadow detail back in the next step.
Now that we’ve made the image darker, we need our detail back in the blacks!

Ah! There’s the detail…

Lift the blacks to get our detail back.
Now to start getting those warm highlights:

Push in some red.

Pushing in some red and orange to get the highlights warm.
Now to pull back a little in the mids:

Pull it back to a normal look.

Compensate for the warm highlights by pulling back with some green/cyan in the mids. This will also bleed in to our shadows just enough to give them the tint we want, which you’ll see in just a second.
The last step is to make the image just a little bit more “hazy” by pulling back the saturation:

Pull the saturation back by almost half!

The final node tree.
The final graded image! Pulling the saturation down helped the cyans we pushed not the mids blend a bit better with the actual colors in the location to make a greenish tint in the lower mids and shadows. Nice!
Well there you go. The first of a series of posts I’m planning to do on some looks I created for various projects, and my first post using Resolve. Hope you get some use out of it!
Attached is the Resolve PowerGrade for this look. Use it just like suggested above, don’t forget to adjust the first node to balance your specific shot, and it should be a great base for you. As usual, feel free to use this look in your projects all you want, but please don’t share or distribute this preset. Instead, send them here to get it.


04/23/2012, 5:40 pm
Welcome back Aaron ! I hope new Fatherhood is treating you well. I will switch once Apple announces new hardware. Just waiting on that and Thunderbolt monitoring options and I’ll be on the Resolve bandwagon. It will be sad to leave the comfy pair of slippers that Apple Color has become for me, I know it like the back of my hand, but alas, time and software move on.
04/24/2012, 3:06 pm
Thanks Marcus! Fatherhood is going wonderfully :)
I was holding out on a new Mac Pro too, but finally decided that I’d be better off getting work done and getting used to the software. There’s always something new on the horizon, so if you keep waiting you’ll never get it (though I do understand waiting for Thunderbolt support. That’s what I wanted too!).
Color was great but, once I figured out a few quirks with bringing FCP projects into Resolve, I’ve found that I’ve gotten much faster in Resolve than I ever was in Color (the built-in tracker being a huge reason for this. It’s amazing!! Helps out big time on windows and vignettes.). I definitely don’t regret moving to Resolve one bit!