Another way to preserve skintones is to pull a key on the skintones and bring them back to a normal hue with a secondary. Programs that have the ability to pull a key from the source or from a previous node/room have an advantage in this.
This is just a quick introduction to secondaries, but a great way to bring your skintones back in a very aggressive look is to pull a key on the skin and correct them that way. This works best when the push pull method won’t work, but runs the risk of looking very unnatural depending on the grade. Here’s an example:

Primary grade only
Let’s try the push/pull method first:

Cool shadows and natural skintones
A good start, but one problem with what I might actually want. Look at the roof of building behind him, or at the boxes, or even his shirt. In order to get his skintones normal, I had to warm up the highlights, which affects those other things too. What it I wanted a total blue/cool wash, with cool highlights too? Just shooting for that yields this:

Blue/cool wash
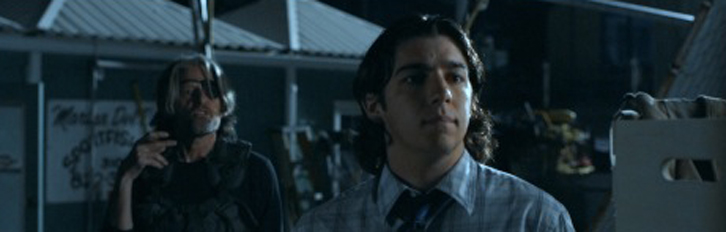
Well, the highlights are right, but the poor kid looks like he’s frozen. The skintones are right. So let’s pull a key and see what we can do:

The qualifier/key settings
After pulling the key and warming up his skin, we get this:

I get my cool highlights, but he still gets natural skin...
It’s not a perfect key (I did this quick for this post), but you can see how it gives me what I want. It’s a powerful tool, just be careful not to abuse it.


